Kansas City Polymer Clay Guild

Kansas City: The Kansas City Polymer Clay Guild meets on the second Tuesday of each month, with quarterly "Clay Play Days" on Saturday afternoons. We learn, experiment and play with various techniques and new products and have a great time doing so!

Check out our website or our Facebook group.

Thursday, December 10, 2009

Layered Lentils by Lynette

By my count we had 17 beads exchanged, but only a few people have sent me a simple paragraph describing the techniques they used. So here's how I created my lentils...


First I processed up some scrap clay and also made a pale green. The scrap was rolled into a snake, cut into equal pieces and rolled into balls. The light green was used to cover each ball with a thin layer.

I gathered up a few older canes (white stars in translucent, white/translucent spiral, an older green leaf cane, etc.) and woke them up (a little squeeze pressure and wiggling to soften the clay before slicing.) I also made several new canes, using translucent and opaque clays: white & translucent stripe, green & translucent stripe, a lace cane with white wrapped translucent and random tiny blue/green snakes, dark green & translucent spiral. I made another lace cane using some reduced white starburst cane, wrapped in translucent & olive green.

Next I cut VERY THIN slices from all the canes and layered pieces randomly over each ball. Then I rolled the ball smooth in my hands, applied pressure with the plexi square and rolled each ball into a bicone, which I flattened into a lentil. Then I baked the clay.


Holes were drilled AFTER baking using my new mini-drill press and my lentil drilling jig, which I made following instructions found here. Great idea from Desiree's Desired Creations - thanks!  I altered mine a bit, using a heavy duty cardboard tube glued to the board rather then buy a 48" piece of 1/4 round. I used a small finishing nail instead of a needle - hammered straight in and with the head snipped off. You still must be careful to match the drill bit with the nail, so they just kiss and drill the starter hole straight.

After drilling, the beads were sanded with the standard series of wet sand papers then polished on my buffing wheel. (I keep trying to achieve the same level of gloss that Debbie Updegraff - she sets the bar pretty high!)


Coming soon: How I was inspired by those striped white/translucent canes to make some angelic music! But that's another story and another guild.

Saturday, November 28, 2009

Mazzie Talley's Calla Lily Beads


Calla Lily beads
Mazzie starts with a Skinner blend, rolled at a very thin setting and cut out heart shapes. Using a metal cake icing tip ( #2 or #3) as a form, place the tip of the cone between the lobes of the heart, leaving the point of the heart at the widest part pf the icing tip (bottom).

Fold over one lobe of the heart (always using the same side first). Wrap the second lobe around, mark where it will cover the first and trim away the excess clay from beneath the second lobe. Trim at an angle to create a smooth surface for the second lobe to lie upon.

Tap the tip of the cone so the hole is open and the top of the bead is flat. Bake clay lily for 12 minutes.


Assemble by placing enough beads on a long head pin so the end bead shows the way you want it to.  I used one crystal tear drop, eight size11/0 clear beads and one size 6/0 bead, a second cone, one size 6/0 bead and a final size 6/0 bead and then formed a wrapped loop to finish. Hopefully this is understandable.

Robin Young's Large Inked Oval Beads


Robin's technique: "I first made a stack of clay with ecru and green stripes.  I then stamped in it and sliced off pieces of makume gane (using Barbara McGuire's mokume technique.) I added alcohol inks in three greens, yellow, red and rust.  I added some acrylic paint to the top and cut out the pendants.  I added a stamped backing of copper clay.  After baking, I put three layers of sealer on top and that was about it." She always makes it sound so simple!


Thursday, November 19, 2009

Pear Beads by Donna Hess

Next installment of the explanations of  "how did you do that???" from the 2009 Kansas City Polymer Clay Guild's annual bead exchange. These are Donna's green pear beads. Read how she did them below.

I'm still waiting for info from more of you....to be posted right here.


Donna says to start with translucent clay and added green fine embossing power. (She says medium would have worked better.) Mix clay and powder. Shape into pear shapes, pierce hole and bake. Once cooled, dab on red and butterscotch ink with a Q-tip and let dry. Done! So simple. Now she just needs a small tree and one partridge!

Check out Donna's website

Monday, November 16, 2009

Kim Keane's Faux Jade Beads

Here is the first of the explanations of  "how did you do that???" from the 2009 Kansas City Polymer Clay Guild's annual bead exchange. These are Kim's great jade tablet beads. Read how she did them below.


Jade; I used Dotty’s McMillan’s technique in her book Artful Ways with Polymer Clay. I mixed translucent and leaf green with a tiny bit of orange to create the jade color. Barbara McGuire’s beautiful stamps to make an impression. Baked then painted with titanium white. I then rubbed the white paint off leaving paint in the crevasse to look antiqued. Sanded and buffed.

Sunday, November 15, 2009

2009 Holiday Exchange Beads


by Liz Willis


by Anne Rowe


by Lynette Fisk

by Jana Kimberling


by Debbie Updegraff

Linda Lee Stewart
Posted by Picasa


by Mazzie Talley


by MariEtta Adams


by Donna Hess


by Kim Keane
Posted by Picasa


by Deb Williams


by Michele Wineland


by Patti Welch


by Carol Hooper
Posted by Picasa


by Robin Young


by Terri Stettnisch
Posted by Picasa

Kansas City Polymer Clay Guild

The Kansas City Polymer Clay Guild held their annual holiday bead exchange last night - what a create group of bead makers these people are!!

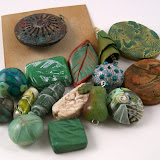
Everyone who want to participate made enough beads for all - some worked late into the night, some did them yesterday morning and some have been done for ages....well, for a couple days at least. But beads using the general theme of GREEN BEADS were lovingly rolled, sculpted, impressed, antiqued, painted, buffed, polished and brought to share. Everyone went home with one of each to use as desired.

Each person described their creative process, which I volunteered to post for us all to read. This may take a few days, since I have invited everyone to contribute, but the info will be posted here for the world to see.


2009 bead exchange KCPCG